This article helps our Volunteer Squad keep the database clean and consistent! It pertains to members who have the Contributor role and above. If you're interested in getting involved, read more about joining the Squad here. We'd love to have you aboard!
 The Manage Database Items page is one of our most powerful tools, helping Volunteer Squad members find Database Items that are missing data or otherwise need work. Because Manage Database Items is such a powerful tool, it's also somewhat complex, so this article is a detailed explanation of all the options available. If you have any questions, please reach out via the green "Contact hobbyDB" button at the top right.
TABLE OF CONTENTS
Overview
You can access Manage Database Items from anywhere on hobbyDB. Just open the Curation menu at the top of the page, then click Manage Database Items.
When you first access the page, it will show a table listing the most recently added Database Items. Filters (more info below) can be used to narrow down the items listed. Each row is an individual Database Item, and the table has several columns showing details about each item. Some of the column headers have a blue arrow icon next to the name, indicating that you can click it to sort the table based on the data in that column. You can also use the blue Sort menu above the table to sort the table.
Here's an explanation of each column, from left to right:
- Selection Toggle - Each row has a gray toggle slider, allowing you to select multiple items to perform a Batch Action on (more on Batch Actions below). Clicking the slider in the header row will select all items on the current page.
- Member Name | Id1 shows the name of the member who added the item and the item's HDBID. Each Database Item has a unique HDBID which can be used to quickly identify a specific entry.
- Main Photo shows the item's Main Photo. You can click the photo to enlarge it.
- Name1 shows the Item Name with a link to the database item, plus the Subvariant Title, and Alternative Name if the item has them.
- Estimated Value1 shows the item's Estimated Value, or a link to add a Member Estimate if the item doesn't yet have an EV.
- Variant Group1 shows the item's Variant Group ID, which can be clicked to quickly filter the table to show all items in the Variant Group, a count of the items Variants and Subvariants, and a Make Master button which can be clicked to make the item the Master Variant of the group. If the item is the Master Variant, it will say "Master Variant" in red in place of the Make Master button.
- Database Item Type links to a database search showing all items with that type.
- Brand, Series, Exclusive To, Related Subjects, Autographed By lists, in that order, all the Subjects associated with the item.
- Production Status shows the Production Status(es) of the item.
- Reference Number1 shows the value of the item's Reference # field.
- Release Year1 shows the year the item was released.
1 Clicking this header will sort the table by the data in that column.
By default, 30 items are shown at a time. At the bottom of the page, there is a drop-down menu to change the setting to show anywhere from 5 to 50 items per page. You can also navigate between pages and see how many total items match the current combination of filters and scope. Note: to help keep the server running smoothly, currently this only counts up to the items shown on the current page even if there are more results.
Back to top of Overview section
Back to Table of Contents
Filters
There are many filter options in a column on the right side of the Manage Database Items page to help you find the exact items you're looking for.
You can use multiple filters at once to narrow down the results.
When you are ready to apply the filters, click the blue Filter button at the bottom of the filter list, or press the return/enter key with one of the text filters selected.
If filters have already been set, you will see this box above the filter list:

Clicking the red Clear Filters button will reset all filters to their default state for a fresh search.
Each filter is described below. Note that some of the Subject filters are limited to specific Subject Types.
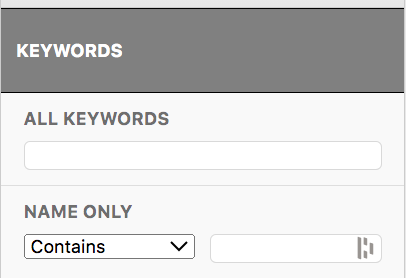
Keywords
- All Keywords returns results just like the main database search, finding the text you enter among all the items' keywords.
- Name Only filters by the Item Name. The Alternative Name is not included in this search.
Subjects

- Brand filters by Subjects (Brand type only) that are in Database Items' "Brand" field. Type the name of the Brand you're looking for and any Brands containing the name entered will show in the list.
- Series functions the same as the Brand filter, but instead finds Subjects (Series type only) in database items' "Series" field.
- Exclusive To
- Related Subjects filters by Subjects in database items' "Related Subjects" field. All Subject types will display in this filter.
- Autographed By filters by Subjects in Database Items' "Autographed By" field.
Other Attributes

- Database Item Type is a searchable drop-down menu where you can select one of the many Database Item Types.
- Produced From allows you to specify a date range to return only items produced within that range.
- Production Status finds items with a Production Status matching the text entered.
- Scale is a drop-down menu with all the scale options that are available on the New and Edit Database Item forms.
- Estimated Value allows you to filter by items with an Estimated Value Greater Than, Less Than, or Equal To the value entered.
View Related

- Variant ID filters for items in the Variant Group with the specified ID.
- Master Subvariant ID finds items connected as Subvariants to the item with the HDBID entered (must be the Subvariant set as Master Subvariant)
- Hide Subvariants allows you to specify if you want to see all Subvariants (set to "Any" or "No") or show only Master Subvaraints (set to "Yes).
Member Related

- Created By Role filters for items created by any hobbyDB member who has the specified Squad role.
- Added By filters for items created by the specified hobbyDB member.
- Created At is a date filter with From and To fields, used to find Database Items that were added within the specified date range. Clicking in one of the fields will bring up a calendar date picker that can be clicked to set the date, or a date can be manually entered in the format YYYY-MM-DD.
- Ever Revised By filters for items that have ever been edited by the specified member.
- Updated At functions the same as "Created At" above but instead filters for items that were last edited within the specified date range.
Back to top of Filters Section
Back to Table of Contents
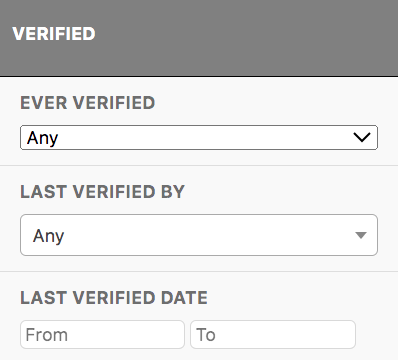
Verified

- Ever Verified filters for items that have been Verified or not. If set to "Yes" it shows items that have been Verified at some point, and if set to "No" it will show items that have never been verified. The default option is "All", which shows items regardless of their verification status.
- Last Verified By filters for items that were most recently verified by the specified Curator.
- Last Verified Date is a date range filter to find items most recently verified within the specified range.
Missing Attributes
Missing Attributes replaced Scopes and are a quick way to find Database Items that need work. The missing attributes include Brand, Series, Estimated Value, Images, Release Date, and UPC.

Using these filters will limit the items displayed to those matching that criterion, preserving any filters that are currently set. This is a great way to quickly find things you can help with that make a big impact or find items to work on as part of a Quest.
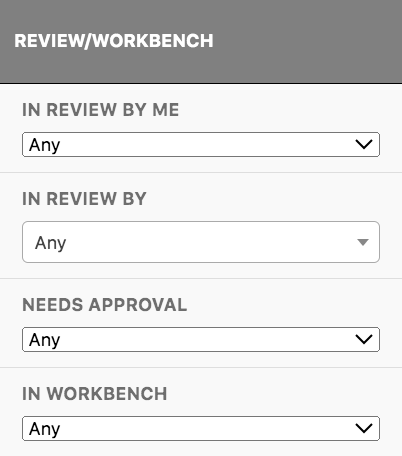
Review/Workbench

- In Review By Me - Items that are in your queue to review
- In Review By - You can filter by the member name that is reviewing items
- Needs Approval - Shows which items have been approved and which ones still need approval
- In Workbench - Filters for items that are already in someone's workbench, or haven't been assigned to a workbench yet.
Batch Actions
 As mentioned above, each row (Database Item) has a gray toggle slider in its first column. Clicking one of these toggles will "slide" the switch to the right, its background will turn green, and the row will be highlighted a light yellow, all indicating that the item has been selected for Batch Actions. Clicking the toggle slider in the header row at the top of the table will select all items shown on the current page.
To perform a Batch Action, click the blue Batch Actions button above the table, then click the action you want to perform. The actions displayed here will depend on your Squad role.
Note: It may take a few minutes for the Batch Actions to process.
Each Batch Action is described below:
- Approve (Mentors) - Approve items after they've been reviewed.
- Review Items (Mentors) - Mark items as in review by you.
- Add And Remove Subjects (Curator and above) - A tool to add or remove subjects from items in bulk.
- Mark as No Packaging - Mark multiple items that do not have any packaging
- Mark as No UPC - Mark multiple items that do not have a UPC
- Create New Variant Group (Creator and above) - Link the selected items as Variants in a new group. Any number of items can be selected.
- Combine Variant Group (Creator and above) - Link the selected items (can only select two) as Variants, but instead of creating a new group, combine the two Variant Groups.
- Create Subvariants (Creator and above) - Link the selected items as Subvariants.
Note: More details on how to link Variants and Subvariants can be found here. - Merge (Coordinator only) - Merge the selected Database Items (must select exactly two). Merging is irreversible, so please read the help page on merging items before performing this action.
- Unlink Variants (Creator and above) - Break the Variant connection between the selected items. This does not break Subvariant connections, so be sure to unlink Subvariants as well.
- Unlink Subvariants (Creator and above) - Break the Subvariant connection between the selected items. This does not break Variant connections.
- Edit Database Item Type (Coordinator only) - Change the Item Type of the selected items. All variants of the selected items will also be changed.
- Fix Master Variant (Admin only) - Set the Master Variant of the Variant Group to the group's oldest item.
- Add To Workbench (Members selected for help testing only) - Take the selected items to be processed in the Workbench tool. Access is limited right now while the tool is in beta testing.
- Delete (Admin only) - Permanently delete the selected items.
